TLS or Transport Layer Security is the cryptographic protocol that allows your internet connected devices to contact any website or any API or cloud service securely (over HTTPs). It adds privacy to your connection, by encrypting the transferred data, and more importantly helps your computer make sure that it’s talking to the right server, and not an impostor.
After our recent article series on E-ID, we have tested the ELFA pilot project by the Swiss E-ID team. In their implementation, it is important that the browser and the mobile app communicate securely using TLS with the server. To being able to run it on a development machine, this makes it necessary to have working TLS certificates on the local machine and the mobile app.
This has shifted our attention to the fact that TLS is something we mostly care about when our system is deployed in a production environment. However, it’s so important that for some applications like E-ID, we should test our application locally with TLS enabled.
This is why, In this article, we will explore how to build a Python server app with TLS enabled in local development. We will also focus on the process of creating the TLS certificates and how they work.
In a deployed environment, you will also need to understand some logistics of how certificates work. This tutorial will not touch on how nor where to buy a TLS certificate.
Before we start
Technical knowledge required: Python programming, basic terminal skills
This article is designed to be a practical tutorial that you can follow step by step.
You should be familiar with Python and ideally used a web framework before. In this tutorial, we will use FastAPI which is a popular modern web framework for Python.
We will use a Linux environment in our tutorial.
Kickstarting the project
Laying the ground work for a new application
Let’s start by setting up a simple FastAPI server.
Installing main dependencies
# We will call our project tls_master
$ mkdir tls_master && cd tls_master

# Installing the web framework we will use
$ pip install fastapi
Adding an API call
After getting the environment ready, the next step is to write the simplest server possible, and we do that by following the official documentation on FastAPI
we create a new file called main.py with the following content
from typing import Union
from fastapi import FastAPI

app = FastAPI()

db = []

@app.get("/")
def shopping_cart():
    return db


@app.post("/")
def register_new_information(data: dict):
    db.append(data)
    return db
To run this server over http/ without TLS, we use the command
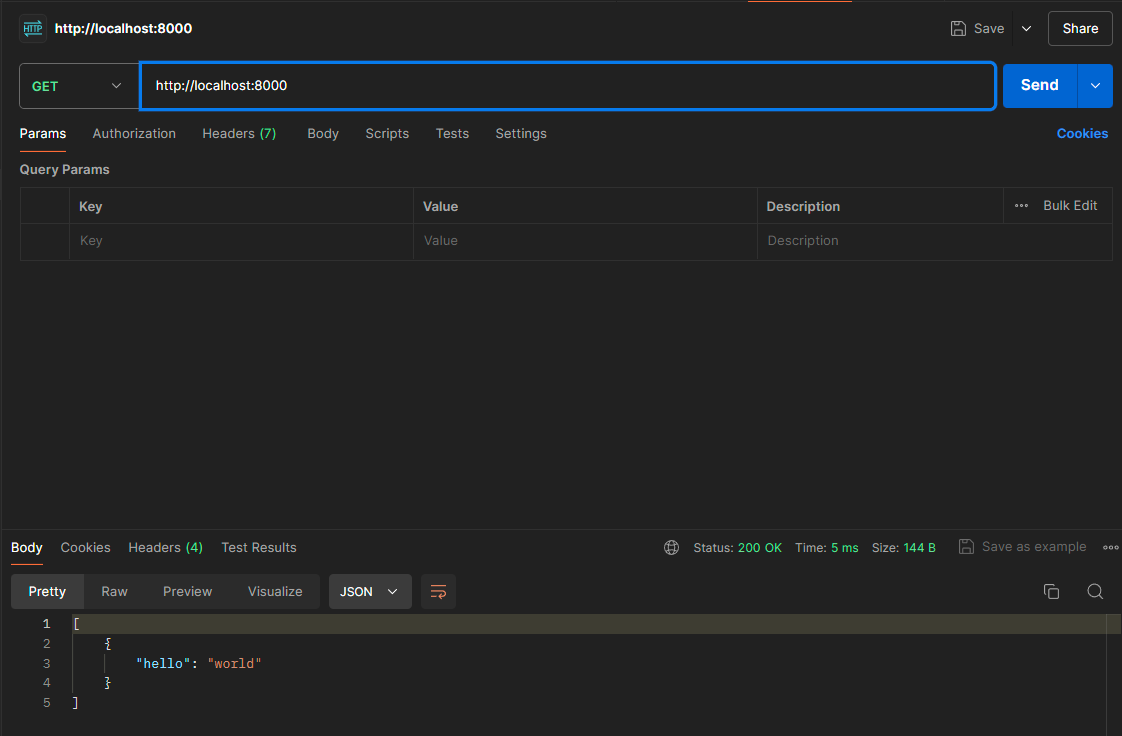
$ fastapi dev main.py Using postman to test the endpoint
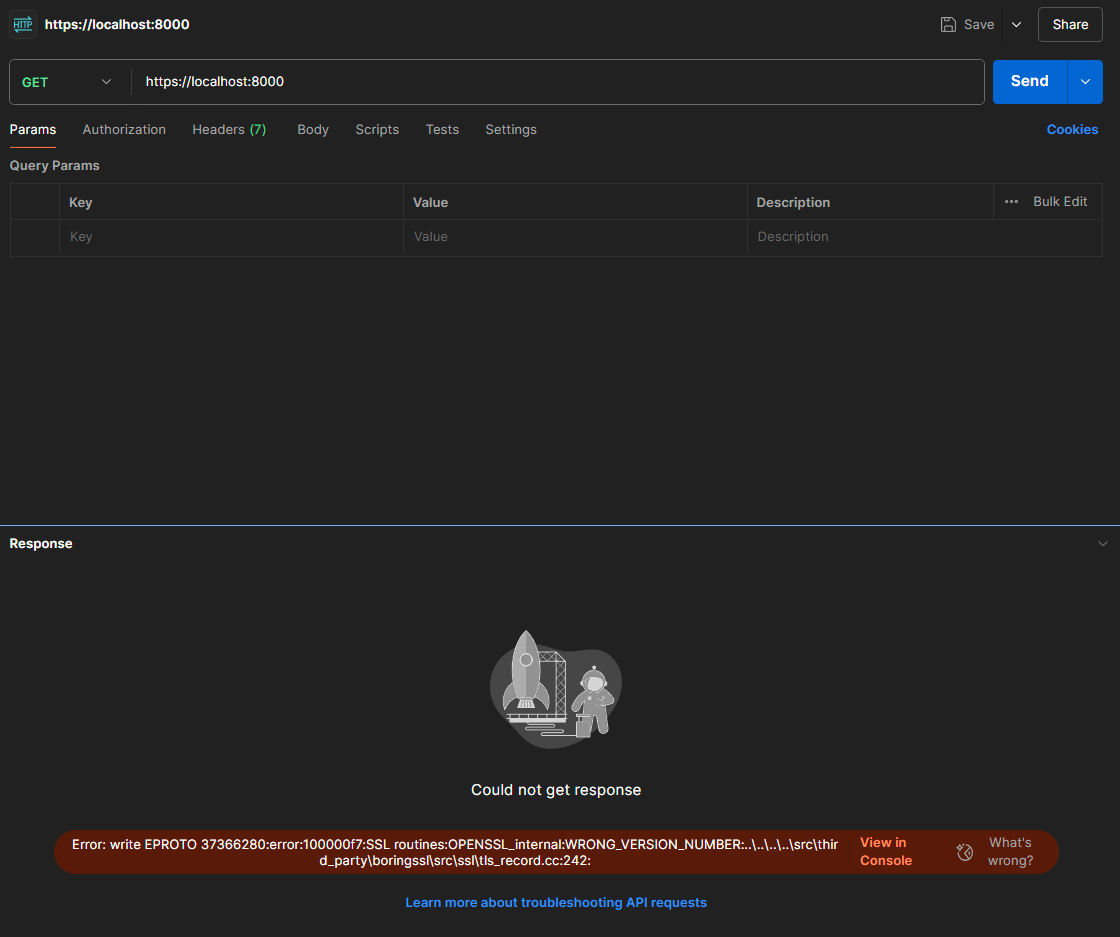
If we try to access the endpoint using HTTPS, we get this error:
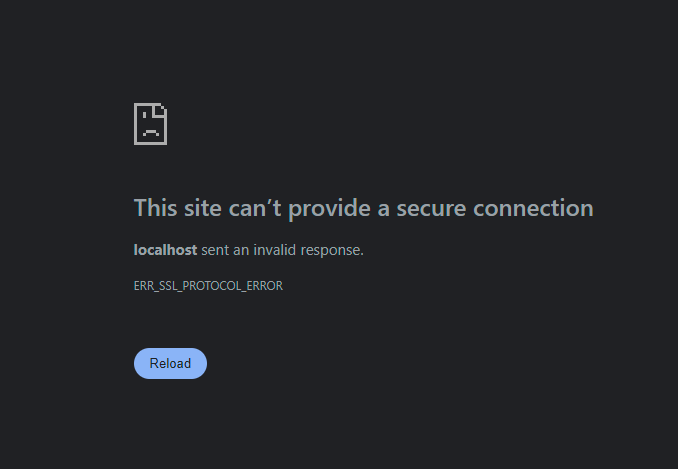
If you try to access this endpoint through a web browser, you will face what might be a bit familiar error message ERR_SSL_PROTOCOL_ERROR
The server logs will also tell us that the request was not valid (notice the last two lines)
INFO: Will watch for changes in these directories: ['/home/green/lab/tls_master']
INFO: Uvicorn running on http://127.0.0.1:8000 (Press CTRL+C to quit)
INFO: Started reloader process [725266] using WatchFiles
INFO: Started server process [725353]
INFO: Waiting for application startup.
INFO: Application startup complete.
INFO: 127.0.0.1:42136 - "GET / HTTP/1.1" 200 OK
WARNING: Invalid HTTP request received.
WARNING: Invalid HTTP request received.
Generating the certificates for TLS
Now to enable TLS on our server, the first thing to do is to create the TLS certificates.
You will need openssl next. If you don’t have it, install it here.
$ openssl req -x509 -newkey rsa:4096 -nodes -out cert.pem -keyout key.pem
       -days 365 -addext "subjectAltName=DNS:localhost"
...
...
...
-----
You are about to be asked to enter information that will be incorporated
into your certificate request.
What you are about to enter is what is called a Distinguished Name or a DN.
There are quite a few fields but you can leave some blank
For some fields there will be a default value,
If you enter '.', the field will be left blank.
-----
Country Name (2 letter code) [AU]:CH
State or Province Name (full name) [Some-State]:VD
Locality Name (eg, city) []:Lausanne
Organization Name (eg, company) [Internet Widgits Pty Ltd]:EPFL
Organizational Unit Name (eg, section) []:C4DT
Common Name (e.g. server FQDN or YOUR name) []: TLS test site
Email Address []:john.snow@epfl.ch

$ ls -R
main.py tls

./tls:
server.crt server.key
The command above creates two files server.crt and server.key – the TLS certificate and its related key.
Let’s break it down a little bit:
openssl: The command-line tool for OpenSSL, a widely used cryptographic library.req: The subcommand for handling certificate signing requests (CSRs) and X.509 certificates.x509: This flag instructs OpenSSL to create a self-signed certificate directly, skipping the CSR generation step.newkey rsa:4096: Generates a new RSA private key with a length of 4096 bits. The longer the key, the stronger the security, but it also requires more computational resources.nodes: Prevents the private key from being encrypted with a passphrase. This is generally not recommended for production environments as it makes the key less secure.out cert.pem: Specifies the filename where the generated certificate will be saved (in PEM format).keyout key.pem: Specifies the filename where the associated private key will be saved (also in PEM format).days 365: Sets the validity period of the certificate to 365 days (one year).addext“subjectAltName=DNS:localhost”:
This is a crucial part for local development. It adds a Subject Alternative Name (SAN) extension to the certificate, allowing it to be valid for the domain “localhost.” This is necessary when you plan to use the certificate for testing websites or services running on your local machine.
Updating fastAPI to enable TLS
The fastAPI dev server we’ve used before is not built to handle HTTPS connections, so we will switch to a very popular python web server called uvicorn .
$ pip install uvicorn

# uvicorn can still work in HTTP mode
$ uvicorn main:app

INFO: Started server process [732368]
INFO: Waiting for application startup.
INFO: Application startup complete.
INFO: Uvicorn running on http://127.0.0.1:8000 (Press CTRL+C to quit)
The command uvicorn main:app should behave exactly the same as the fastapi dev server
Adding the certificates to our local server
now, we update the command slightly to enable TLS.
# We specify the certificate and key files to the server
$ uvicorn main:app --ssl-keyfile tls/server.key --ssl-certfile tls/server.crt
testing our API again
Now that we’ve enabled the server with a certificate, it will only respond when we use HTTPS. Calling the server over HTTP will return ERR_EMPTY_RESPONSE
However, a HTTPS request on the other hand leads to the expected response:
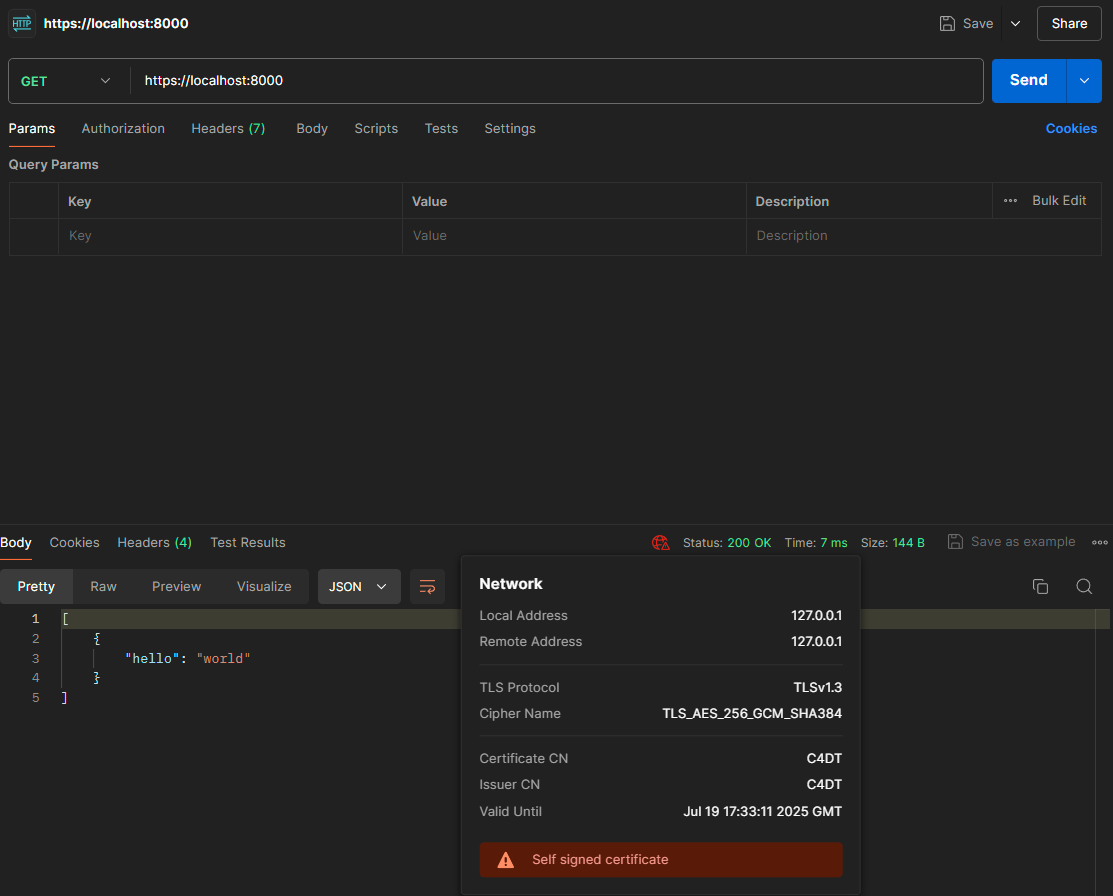
But not all is well: notice the red icon in the response box? It says “Self signed certificate” which means that no trusted third party verified this certificate. It could be your local ISP trying to impersonate a remote domain, and someone trying to do a man-in-the-middle-attack.
What happens in the browser? — my certificate doesn’t work
For the security reasons above, in production environments, we use certificates signed by a trusted entity, i.e. CA or Certificate Authority, such as, e.g., Let’s Encrypt.
Consequently browsers will warn you not to access this site when you try it now.
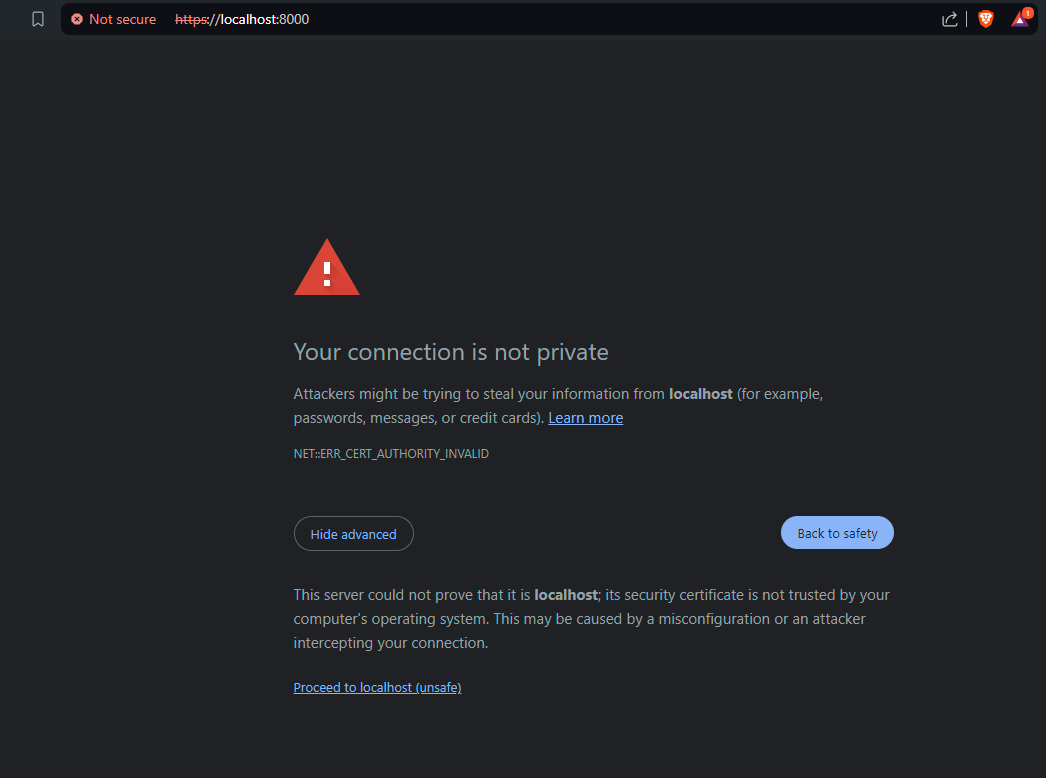
This is different from Postman which gives developers more responsibility and just shows a warning but still executes the request.
Adding Trust
You’re probably wondering how the browser knows that this certificate is not signed by a trusted CA. It’s simple, browsers and operating systems have a stored list of root CA certificates. Browsers use that list to do a “Certificate Chain Verification” which is a process that verifies the authenticity of the certificate and its issuers.
To use our API with TLS in the browser, we can add an exception in the browser for this certificate on this domain (by clicking “Proceed to localhost (unsafe)”). Please note that this is generally not recommended.
Another option is to tell our operating system to trust this certificate directly, and then we will never see the “not secure” problem in any of the browsers on this computer (nor in postman).
Updating the system’s certificates
To add the certificate as trusted depends on your operating system. For Linux, you need to do the following:
- Copy the certificate file to
/usr/local/share/ca-certificates/. - Run
sudo update-ca-certificatesin the terminal.
The browser.. Another look!
Refreshing the site shows that there are no TLS issues anymore.

However, Postman will still show the previous warning.
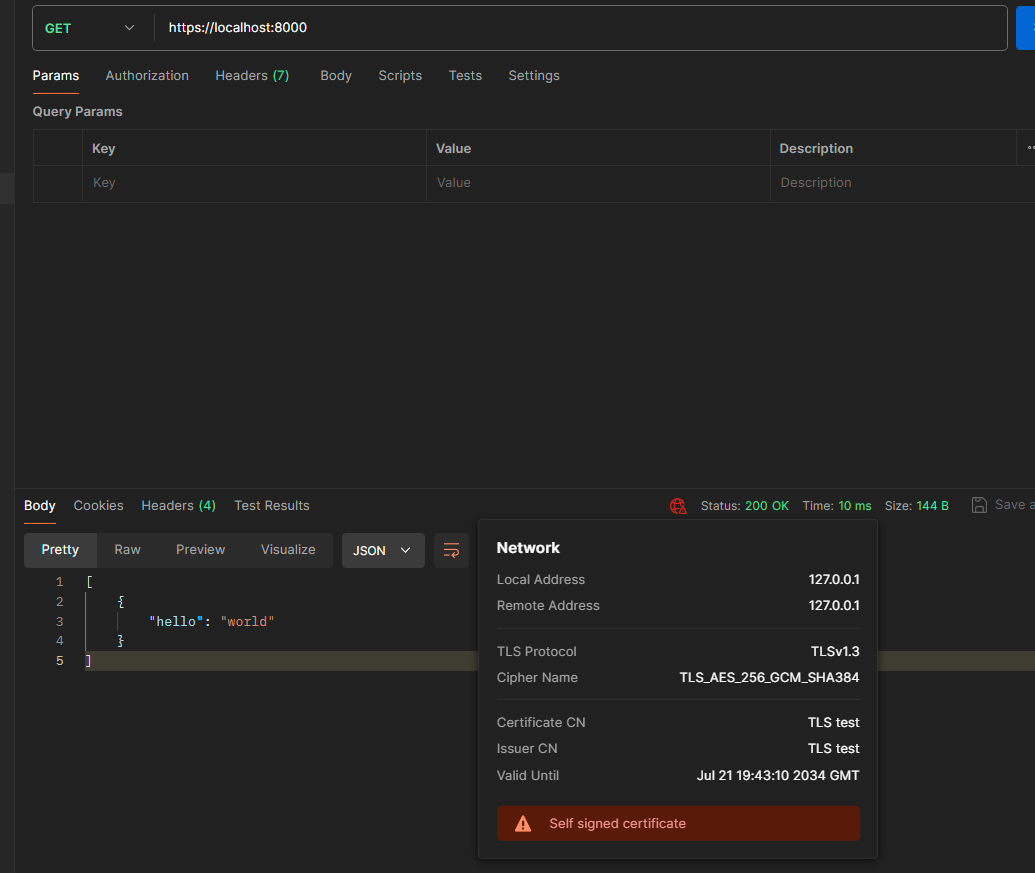
This is because Postman has its own root CA store. To tell Postman to trust our new certificate, we will need to upload it in the settings through the following steps:
- Open Postman settings (File -> Settings or using the wrench icon).
- Go to the “Certificates” tab.
- Under “CA Certificates”, toggle the switch to ON.
- Click “Add Certificate” and select the self-signed certificate file .
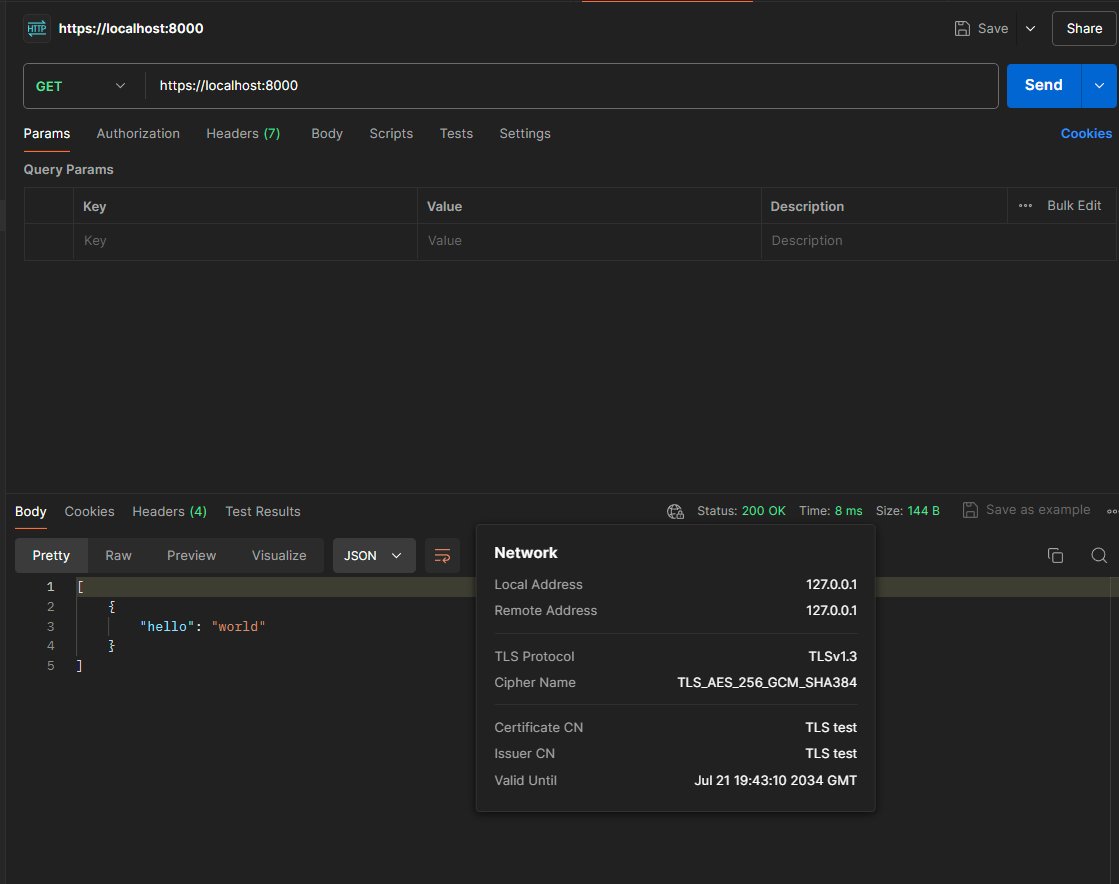
After uploading the certificate, we now don’t have the warning anymore:
Conclusion
At this stage, we’ve successfully deployed a locally-trusted TLS certificate on our local server. Our local development setup is now closer to a standard production setup.
The web browsers, and your operating system usually come with a list of Certificate Authorities that they trust. As long as your certificate is signed by a CA whose root certificate is stored on your operating system, the browser will be able to verify that certificate. However, this should also show you how a malicious CA can easily give away false certificates.
Encrypted HTTP connections are a requirement in any public-facing production system. However, we don’t usually attempt to test HTTPS locally. In cases when a TLS connection needs to be specifically tested, such as when a client -other than a web browser- is used, it makes sense to set up a simple TLS connection locally.
